Table Of Content
- Save More on Every Order – Grab the Latest Coupons & Deals
- Why Pour-Over Coffee Is Worth Learning
- Step 1: Grind Fresh Coffee Beans
- Step 2: Heat Your Water and Prepare the Filter
- Step 3: Bloom the Coffee Grounds
- Step 4: Pour Slowly and Evenly
- Choosing Coffee Equipment From Fellow Products
- Save More on Every Order – Grab the Latest Coupons & Deals
- Frequently Asked Questions
- What is the best grind size for pour-over coffee?
- What temperature should water be for pour-over coffee?
- Why does my pour-over coffee taste bitter?
- Do I need a gooseneck kettle?
- How much coffee should I use per cup?
- Conclusion
Making better pour-over coffee at home does not require professional barista skills or an expensive coffee machine. A few simple adjustments to your grinding, water temperature, and pouring technique can help you prepare a more balanced and enjoyable cup. The secret is understanding how each step affects the brewing process rather than changing everything at once.
Pour-over coffee gives you direct control over how hot water moves through freshly ground beans. This makes it easier to experiment with flavor, strength, and brewing time. Whether you are building a home coffee station or improving your existing routine, these four steps provide a practical starting point. With helpful equipment from Fellow Products, including coffee grinders, precision kettles, and pour-over brewing accessories, you can make the process more consistent without making it unnecessarily complicated.
Save More on Every Order – Grab the Latest Coupons & Deals
Why Pour-Over Coffee Is Worth Learning
Pour-over is a manual brewing method in which hot water passes through ground coffee held in a filter. Unlike an automatic coffee maker, it lets you control the pouring speed, water temperature, and amount of water used.
These adjustments affect coffee extraction and flavor. Consistent pouring, the right grind, and a repeatable routine help you brew a more balanced cup.
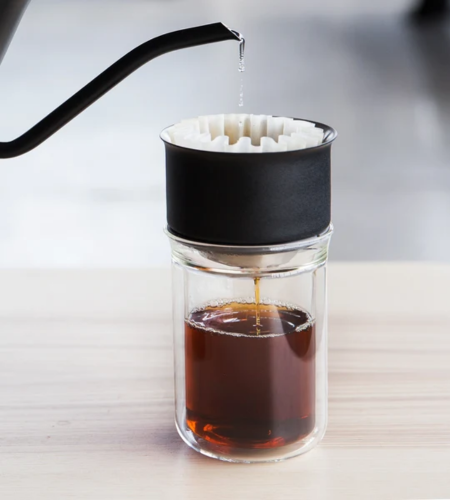
You only need a few essentials to begin:
- Fresh coffee beans.
- A burr grinder.
- A pour-over dripper and suitable paper filter.
- A gooseneck kettle.
- A digital scale and timer.
You can start with basic equipment and add more specialized tools as your skills develop.
Step 1: Grind Fresh Coffee Beans
Freshly ground coffee helps preserve aroma and flavor. Start with a medium to medium-fine grind, adjusting to your dripper and recipe. Coarse grounds may produce weak or sour coffee, while overly fine grounds can cause slow drainage and bitterness.
Practical tip: Begin with a consistent grind and change the setting gradually. If your coffee tastes sour and underdeveloped, try grinding slightly finer. If it tastes harsh or overly bitter, try a slightly coarser setting.
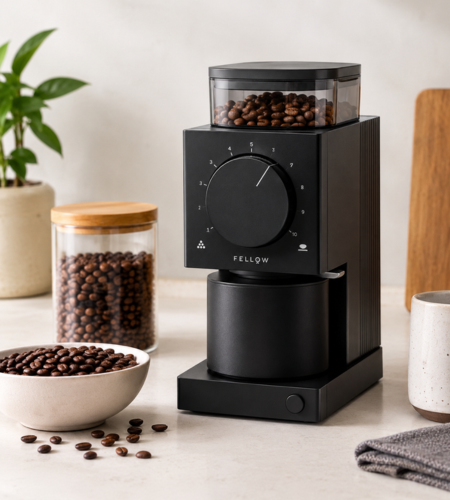
Practical tip: Begin with a consistent grind and change the setting gradually. If your coffee tastes sour and underdeveloped, try grinding slightly finer. If it tastes harsh or overly bitter, try a slightly coarser setting.
Fellow Products offers the Ode Brew Grinder range for home coffee preparation. A dedicated burr grinder can help produce consistent grounds and makes it easier to repeat a recipe once you find a setting you like.
Step 2: Heat Your Water and Prepare the Filter
Water temperature affects how quickly flavor compounds are extracted from coffee. Water that is too cool may produce a less developed cup, while excessively hot water can emphasize unwanted flavors in some brewing situations.
A useful starting temperature for many pour-over recipes is approximately 200–205°F (93–96°C). However, different beans and roast levels may benefit from adjustments.
Before brewing, place your paper filter in the dripper and rinse it with hot water. This helps the filter sit properly and can reduce papery flavors. Discard the rinse water before adding your coffee grounds.
Next, weigh your coffee and water instead of estimating their amounts. A starting ratio of 1 gram of coffee to 15–16 grams of water works well for many recipes. For example, 20 grams of coffee with 320 grams of water provides a 1:16 ratio.
Fellow’s Stagg EKG Pro kettle offers adjustable temperature control and a precision gooseneck spout. These features can help you maintain a chosen temperature and direct water more carefully during brewing.
Step 3: Bloom the Coffee Grounds
Blooming is the short first stage of brewing when you pour a small amount of hot water over the grounds and allow them to release trapped gases.
Start your timer and pour enough water to saturate all the grounds evenly. A practical starting point is approximately twice the weight of your dry coffee. For 20 grams of coffee, use around 40 grams of water.
Wait approximately 30–45 seconds before continuing. You may notice bubbles forming on the coffee bed as gases escape.
This step helps prepare the grounds for the remaining water and may support more even extraction. Make sure the entire coffee bed becomes wet rather than leaving dry pockets around the edges.
Practical tip: Pour gently in small circles, beginning near the center and moving outward. Avoid pouring directly onto the paper filter, as water can bypass some of the coffee grounds.
The exact bloom duration may vary according to bean freshness and your brewing recipe, so treat these measurements as a starting point rather than strict rules.
Step 4: Pour Slowly and Evenly
Once blooming is complete, continue adding water in controlled, circular pours. Start in the center and move outward without repeatedly pouring directly against the filter.
Aim to keep the coffee bed evenly saturated. A gooseneck kettle is useful because its narrow spout makes it easier to control the direction and speed of the water.
For a 20-gram coffee recipe using 320 grams of water, you can divide the remaining water into two or three pours. Allow some water to drain between pours, following the approach recommended for your dripper.
Total brewing time commonly falls within approximately two to four minutes, although the correct timing depends on the equipment and recipe.
After brewing, taste the coffee before making adjustments. If it tastes weak or sour, experiment with a finer grind or slightly different brewing parameters. If it tastes bitter or dry, try a coarser grind or a modest temperature adjustment.
Change one variable at a time so you can understand what improves the result.
Choosing Coffee Equipment From Fellow Products
Fellow Products offers home-brewing equipment, including kettles, grinders, pour-over accessories, and precision scales.
- Stagg EKG Pro: Precise temperature control and pouring.
- Ode Brew Grinder: Adjustable grinding for home brewing.
- Stagg Pour-Over Accessories: Tools for manual coffee brewing.
- Tally Pro Precision Scale: Accurate coffee and water measurements.
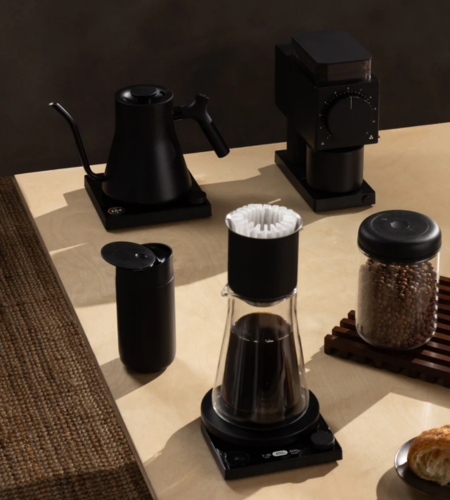
These products can make certain brewing steps easier to control, but expensive equipment cannot compensate for stale beans, an unsuitable grind, or inconsistent technique.
Compare product specifications, capacity, current pricing, and compatibility before choosing your setup.
Save More on Every Order – Grab the Latest Coupons & Deals
Frequently Asked Questions
What is the best grind size for pour-over coffee?
A medium to medium-fine grind is a useful starting point. Adjust according to your brewer, drainage speed, and the flavor of the finished coffee.
What temperature should water be for pour-over coffee?
Approximately 200–205°F (93–96°C) works as a starting range for many recipes. Experiment based on your beans and preferred flavor.
Why does my pour-over coffee taste bitter?
Possible causes include a grind that is too fine, excessive extraction, or a brewing recipe that does not suit your beans. Try a slightly coarser grind first.
Do I need a gooseneck kettle?
No, but it can make slow, controlled pouring easier. A regular kettle may be sufficient when you are beginning.
How much coffee should I use per cup?
Try a ratio of 1:15 or 1:16. For example, 20 grams of coffee with 300–320 grams of water is a practical starting point.
Conclusion
Learning how to make better pour-over coffee at home comes down to four habits: grinding fresh beans, heating water appropriately, allowing the coffee to bloom, and pouring slowly and evenly. These small adjustments can make your brewing routine more consistent and help you discover the flavors you prefer.
Start with a simple recipe, measure your ingredients, and change one variable at a time. If you want greater control over temperature and pouring, explore the coffee equipment available from Fellow Products and choose tools that suit your routine and budget. Good coffee begins with careful technique, not necessarily the largest collection of equipment.